
Ask the person to your left and the person to your right how to cook bacon, and you’ll likely get two completely different answers. Type the very same into Google, and the search engine will proffer over 250 million results. From stovetop to oven to microwave, each with its own series of endless sub-permutations, there are about as many ways to cook bacon as there are, well, ways to eat it. (Forgive us if talking pork products makes us a little lyrical.)
We put six popular methods to the test because we had to know: Which way is better than all the others? You can thank us later for consuming only bacon for two days. Of note, we used the same brand of supermarket-accessible bacon at room temperature for each method, as a control. Anywhere we mention a skillet or pan, it was large enough to provide a wide margin around the strips of bacon, such that its shape wouldn’t have contributed to any scrunching.
Here’s how the results of our tests stacked up.
Stovetop: cast-iron skillet
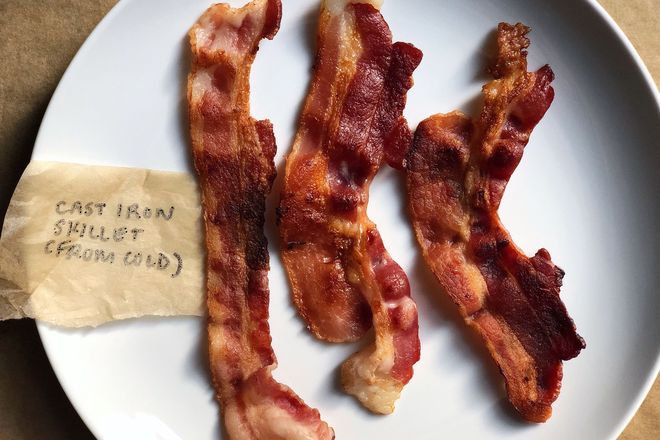
Method: My dad would have you believe using a cast-iron skillet on the stovetop is the only way to cook bacon, so we put it to the test first. To ensure the fat rendered as evenly as possible, we began with a cold cast-iron skillet, then cooked the bacon over medium heat, flipping as needed.
Outcome: We were surprised by the inconsistency of the cook on the bacon strips, given that we moved them around to ensure each got time in the hottest part of the skillet, et cetera. After about 12 minutes, we ended up with absolutely delicious bacon, with varying crispiness and chewiness depending on the strip.
Pros: Perhaps it was the placebo effect of char spots (which none of the other bacon had), but we thought the flavor of the cast-iron skillet bacon was the absolute best of all of the tests. It was also relatively quick—at least, compared to the oven methods, and the skillet-plus-water method.
Cons: Cooking bacon in an open pan on the stovetop produced a bacon grease splatter that wasn’t exactly what we wanted to spend 15 minutes trying to clean from the countertop and floor surrounding the oven. Also, the inconsistent rendering of the fat suggested that we’d need to pay even more attention to the cooking strips than we already had (adjusting heat, flipping/moving them around).
Stovetop: nonstick skillet
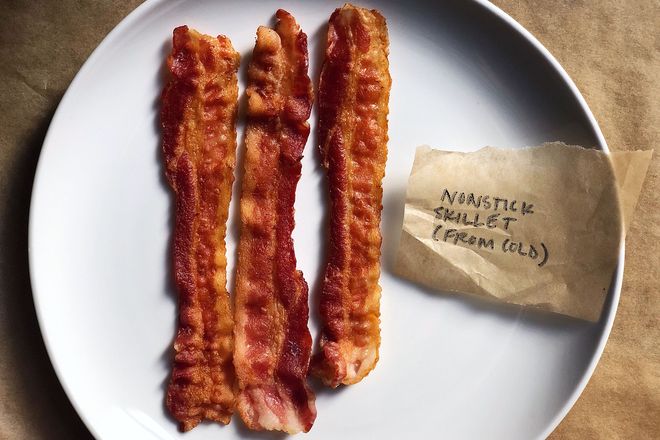
Method: We began with a cold nonstick skillet, then cooked the bacon over medium heat, flipping as needed. (Same exact method as the cast-iron skillet, just with a different pan.)
Outcome: In about the same amount of time as it took to cook bacon in a cast-iron skillet, the nonstick skillet produced super crispy, consistent, flat bacon strips.
Pros: If you like your bacon crispy as a cracker and you value visual consistency, this is the method for you. One (more obvious) pro: A nonstick skillet is way easier to clean than a cast-iron skillet or an unlined sheet pan.
Cons: Our test resulted in bacon with very little chew (just a bit on some of the ends)—mainly just crispiness. Like the cast-iron skillet method, this produced an annoying grease splatter.
Oven: no parchment paper
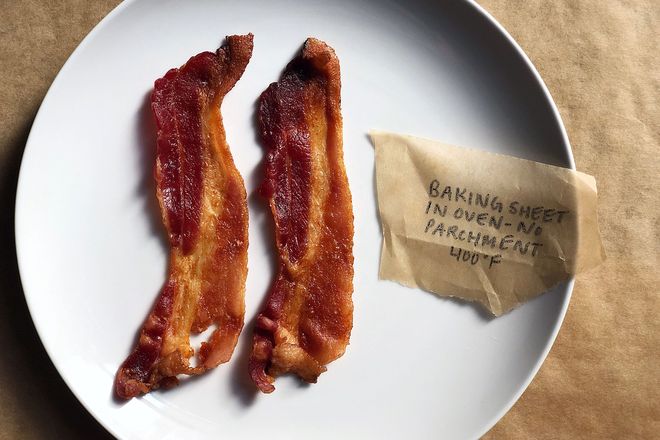
Method: We placed the bacon strips directly on a rimmed sheet pan, and baked them in a preheated oven at 400°F.
Outcome: We’ve proselytized the oven-baking method before, so we had high hopes, and this sheet-pan bacon met them. After about 18 minutes, the fat had rendered extremely evenly, producing a perfectly chewy/crispy specimen.
Pros: This method was very hands-off—we didn’t need to flip the bacon midway through, or fiddle with temperature—yet still hugely effective. The lack of stovetop-surrounding grease splatter was so welcome.
Cons: While the actual cooking of baked bacon takes about five minutes longer than the stovetop method, we also had to wait for our oven to preheat for approximately 10 minutes, so this isn’t a method we’d recommend for those moments when you need bacon ASAP. (What, like you don’t have those moments?) Also, the bacon stuck in one or two spots to the sheet pan, and cleaning the sheet pan was no easier than cleaning the cast-iron skillet.
Oven: parchment paper
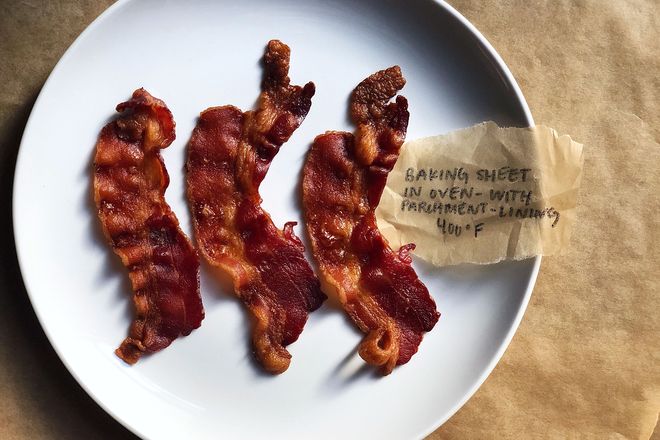
Method: We placed the bacon strips on a rimmed sheet pan that we’d lined with parchment paper, and baked them in a preheated oven at 400°F.
Outcome: Despite taking a little bit longer than the no-parchment method (about 22 minutes in the oven), this test resulted in equally delicious bacon with a nice chewy/crispy balance. It was curlier and more inconsistently crisped on its ends than the no-parchment batch.
Pros: This method had all the same pros as the other oven bacon test—plus, it had a way easier clean-up, because we were able to simply toss the parchment paper. (Shockingly, there were no leaks onto the actual pan, so it just got a quick rinse for good measure.)
Cons: It took about five minutes longer to fully cook this batch of bacon than the batch we baked on a sheet pan sans parchment paper-lining. Also, if your goal is flatter, more consistent bacon, you’d be better off baking without parchment paper.
Microwave
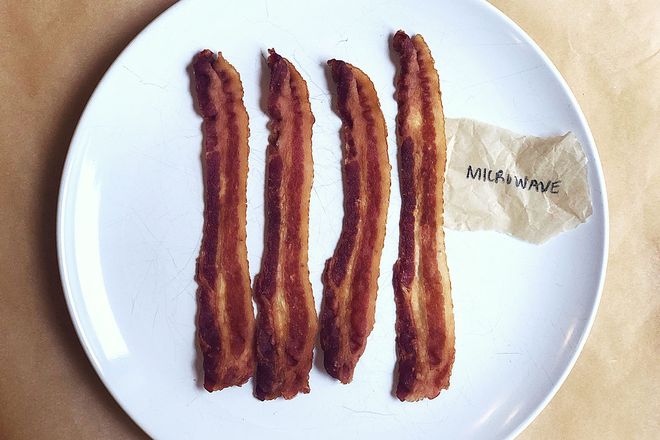
Method: We microwaved bacon on a plate between sheets of paper towels for about five-and-a-half minutes; for the last minute or so (once a fair amount of the fat had rendered), we took the paper towel sheets off the top.
Outcome: This test produced eerily crispy bacon—even crispier than the nonstick pan.
Pros: The microwave method was by far the quickest, and had the easiest clean-up. If you love crispy bacon and don’t have a nonstick skillet (or care to save your bacon fat), this is a great option.
Cons: The bacon had a slightly odd taste we couldn’t quite put our finger on; one team member described it as “kind of stale-seeming.” (Perhaps this was user-error from microwaving for too long.) And because we microwaved the bacon on paper towels to minimize in-microwave mess, we weren’t able to save the rendered bacon fat. There was no chew on the final bacon, just crispiness. Maybe too crispy?
Stovetop: water method
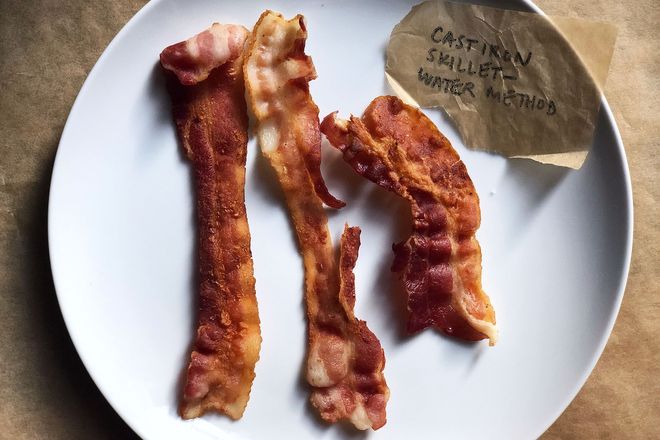
Method: We placed bacon into a cast-iron skillet and added just enough water to cover the strips, then brought the water to a boil over high heat. Then, we lowered the flame and let the water simmer until it had fully evaporated, then lowered the flame a little more and cooked the bacon (flipping as needed) until crisp. (This method comes courtesy of Cook’s Illustrated.)
Outcome: After about 22 minutes, we had bacon that was pretty inconsistently cooked, with crispy, thinned-out middles and less-cooked ends. One strip was less thin, but fairly shriveled.
Pros: The goal of this method is to help the bacon retain moisture as the fat renders, so it’s tender rather than brittle. (This wasn’t really our experience, though—while the ends of the bacon retained moisture, they didn’t render perfectly. Meanwhile, the middle of the strips were a bit brittle.)
Cons: See above. Also, there was a fair amount of grease splattering, and this took almost twice as long as the regular-way cast-iron skillet and nonstick skillet stovetop methods.
Conclusion
The absolute best way to cook bacon depends entirely on how you like your bacon—though some methods produce more consistent results than others.
• If you love bacon with some good chew and crispiness around the edges, opt for baking it in the oven on a rimmed sheet pan with no parchment lining. (Or, if you’re very concerned about minimizing clean-up and don’t mind a little waviness, go ahead and line it.)
• If, like me, all you care about is that classic bacon-y flavor and you don’t care about appearance, go cast-iron skillet on the stovetop.
• If you’re after super crispy, flat bacon, nonstick’s going to be your best friend.
Whatever you do, just be sure to save that bacon fat.